I am officially on the bandwagon, people. I made Elijah and I am in love- with the pure cleverness of the pattern, with the relief of making a seamless toy, and with the flat out unadulterated cuteness that is this little elephant. I mean seriously people, look at this thing...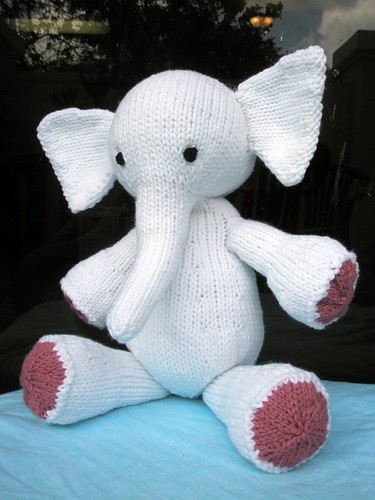
Pattern: Elijah by ysolda
Yarn: One skein of Cotton-Ease in Snow and scraps (literally scraps, as in pulled apart a tangled little mess I found under the couch) of Cotton-Ease in Berry
Needles: Size 5 DPNs. Next time I might use size 4s.
Modifications: Very minor- made the feet pink, didn't use french knots for eyes
For: A pregnant friend at work
There's not much else to say about the amazing pattern that hasn't been said before, but my spatial problems did lead me to have bit of trouble with the right ear. I just didn't get what Ysolda meant when she said to do the right ear in the same way except picking up stitches toward the back of the head first. It literally took me about 3 hours to figure it out, but now I've drawn myself a diagram so next time I'll be okay.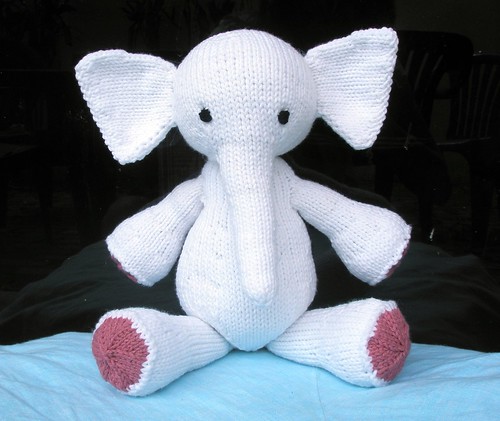
I also used a little trick to make sure the ears were picked up evenly on the right side (ask me how many times I picked up stitches incorrectly, forcing me to come up with this little trick. No, don't. I might cry. Again.) I took a DPN and put it through the stuffed head as evenly as I could at the top of the left ear. Then I took another one and put it through the poor elephant's head at the bottom of the left ear. So there were 2 DPNs ends sticking out on either side of the head. Then I picked up the stitches in a line between the 2 DPN ends on the right side. Finally, the right side looked identical to the left- woot!
Instead of french knot embroidered eyes, which were just too small, I just winged it and tried to make 2 bigger eyes using a method I made up as I went along.
Speaking of which, does anyone know a good tutorial about how to embroider knitting? I just can't seem to find one that answers the many questions I have about it. Thanks for any help!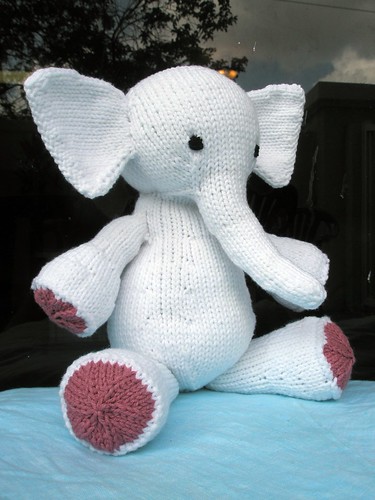
I feel I would be remiss if I didn't mention that this present, which was wildly well-received by my friend and coworkers and made me feel like a freaking superstar, cost less than $10 to make. The pattern was $6, I got a skein of Cotton-Ease with a 50% off coupon and some polyfill at Joann for about $4. If you are looking for a baby shower show stopper but aren't looking to spend a lot, Elijah is the ticket.
Wednesday, May 21, 2008
The cute.
Wednesday, May 7, 2008
Casting on in celebration
So my job hunt is over and come this summer, I'm moving back to Ohio. Although I will miss the heck out of Miami, I am thrilled to be going back home to my family and to be buying our first house. We couldn't afford to buy a cardboard box in Miami, but the market in Ohio is much more forgiving and we already found a great place. As I type, I have HGTV on in the background and I'm scheming about all the DIY stuff I want to do.
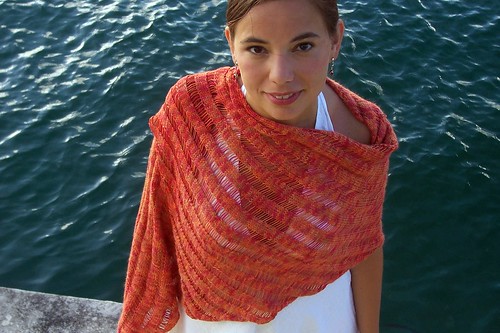
To celebrate, I'm making myself a sweater. I'm hoping it will help me cope with the drastic weather change- I mean, the good thing about winter is the knitwear, right? I loved the Cabled Hoodie from the Paton's Street Smart booklet and was excited to hear that Vy loved it too. We decided to do a mini-KAL, with both of us making major mods to the pattern. Vy subbed the worsted weight for a DK and I decided to change the cable pattern. I just wasn't really digging the bobbles.
I've been working on it for a couple of days and am really coming along on a sleeve: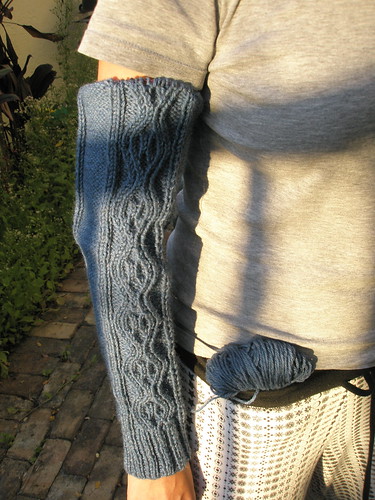
How you like the yarn-ball in the pajama pants look?
Like Vy, mine fits a bit more snugly than I anticipated. Unlike Vy, I am stubborn and delusional and am choosing to believe that this will work out. It really seems to fit, but it won't be a jacket type sweater like I thought. That's okay, right? I have a crazy feeling this post is going to come back and bite me.
I found this Hourglass cable in Barbara Walker's first Treasury and I just love it. It's a bit difficult to keep up with (I had to frog a couple of pattern repeats already) and I had to chart it out to keep up with the 16 row pattern, but I think I'm on track now.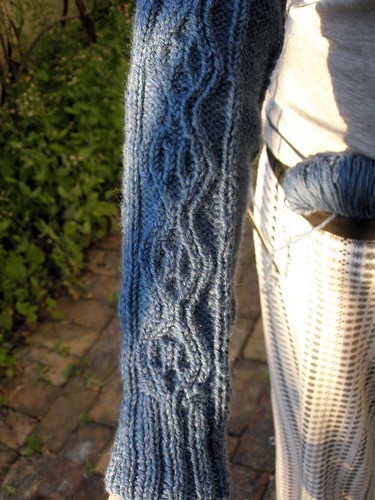
I love this so far. We'll see how I feel when I get to the back and am doing four of these cables across, but for now I'm loving watching my little sleeve grow.
Thursday, May 1, 2008
Onesie Crazy
Ever since I started knitting, I've been pretty much exclusive to it. I used to make cards and mess around with other crafts, but yarn has taken over my free time (and my life, to be honest) to such a degree that now I just buy my cards at Target like everyone else. But at one of my sister's showers we were asked to decorate a onesie and bring it to the party. Cola got a bunch of cute clothes for the baby and we all just felt great about our cleverness.
I decided to use iron-on transfers (I intended to do embroidery, but then I realized that it was really hard. I'm going to save that new craft for later). Just in case anyone is interested, I thought I'd just describe what I did.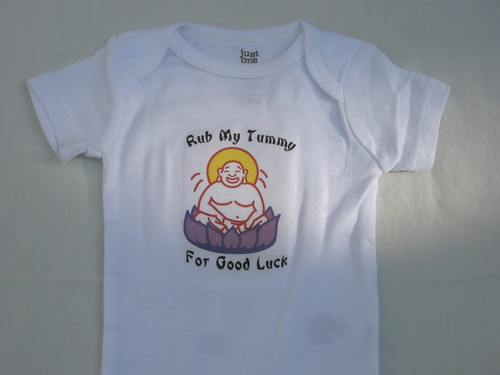
Supplies:
Computer & ink jet printer (I used a color printer, but B&W would work)
Iron On T-shirt transfers (I used Avery ones from Target)
Onesies
Iron
Sharp scissors to cut out image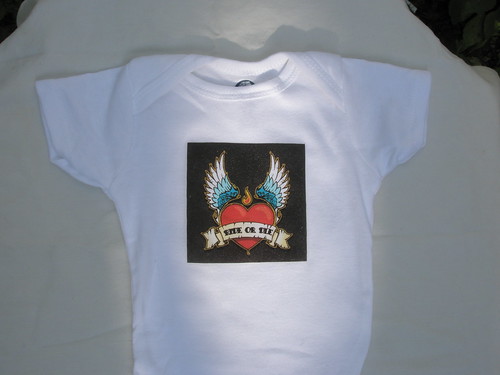
Instructions:
1. Use Google Images to find pictures to depict your ideas. I searched for the perfect buddha to go with the "rub my tummy" shirt for about 3 hours, I think.
2. If necessary, use picnik to manipulate images. I freaking love picnik- I use it for everything. You can bet that every picture you see on this blog has been cropped, brightened, and fixed using picnik.
3. Insert the images into Powerpoint. I put all 4 images that I used onto one slide so I wouldn't waste the iron-on sheets. It's a great deal- 1 sheet = 4 onesies.
4. To put messages on the images, I wanted to use fancy fonts that went with my pictures. There are tons of places to find them online (e.g.,dafont). For example, I really wanted the Hello onesie to have child-like handwriting, so I found a font called "kid's first font" and used that. I also downloaded tattoo lettering font and the eastern-inspired lettering. I had to download the font to my desktop and then drag it to the "font" folder under the "windows" folder, but that could be different for you.
5. In powerpoint, insert a text box over your image and write the message in your chosen font. You may have to mess with this to get it perfect.
6. When you are finished with your images, print them out onto regular paper to test out how they'll look. Cut them out and place them on the onesie to make sure they are the right size. If you're satisfied, print it out on the iron-on paper.
7. Cut out the images, leaving about 1/8 of an inch around the edges.
8. Following the directions that come with your iron on transfers, iron them on. The directions will probably tell you to have the iron as hot as possible for the fiber in the onesie (probably cotton), not to have the steam function set, and to press as hard as humanly possible when ironing. I was super scared about this step, but it worked out perfectly.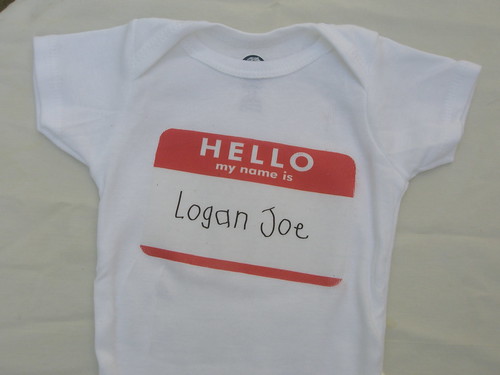
Cute, huh? And such a good deal!
4 100% cotton onesies... 5 dollars
1 sheet of iron on transfer (from pack of 6)... 1 dollar
Forcefully demanding your unborn nephew to declare his love for you from birth... priceless