Ever since I started knitting, I've been pretty much exclusive to it. I used to make cards and mess around with other crafts, but yarn has taken over my free time (and my life, to be honest) to such a degree that now I just buy my cards at Target like everyone else. But at one of my sister's showers we were asked to decorate a onesie and bring it to the party. Cola got a bunch of cute clothes for the baby and we all just felt great about our cleverness.
I decided to use iron-on transfers (I intended to do embroidery, but then I realized that it was really hard. I'm going to save that new craft for later). Just in case anyone is interested, I thought I'd just describe what I did.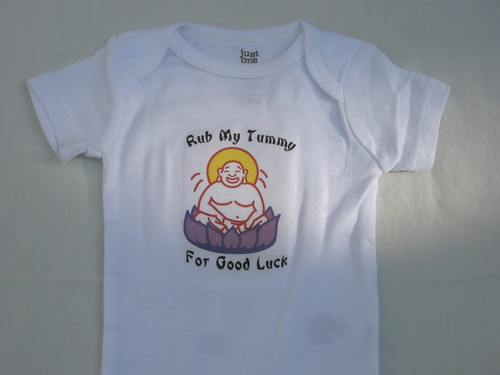
Supplies:
Computer & ink jet printer (I used a color printer, but B&W would work)
Iron On T-shirt transfers (I used Avery ones from Target)
Onesies
Iron
Sharp scissors to cut out image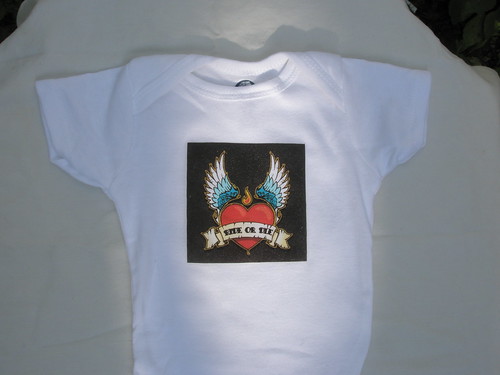
Instructions:
1. Use Google Images to find pictures to depict your ideas. I searched for the perfect buddha to go with the "rub my tummy" shirt for about 3 hours, I think.
2. If necessary, use picnik to manipulate images. I freaking love picnik- I use it for everything. You can bet that every picture you see on this blog has been cropped, brightened, and fixed using picnik.
3. Insert the images into Powerpoint. I put all 4 images that I used onto one slide so I wouldn't waste the iron-on sheets. It's a great deal- 1 sheet = 4 onesies.
4. To put messages on the images, I wanted to use fancy fonts that went with my pictures. There are tons of places to find them online (e.g.,dafont). For example, I really wanted the Hello onesie to have child-like handwriting, so I found a font called "kid's first font" and used that. I also downloaded tattoo lettering font and the eastern-inspired lettering. I had to download the font to my desktop and then drag it to the "font" folder under the "windows" folder, but that could be different for you.
5. In powerpoint, insert a text box over your image and write the message in your chosen font. You may have to mess with this to get it perfect.
6. When you are finished with your images, print them out onto regular paper to test out how they'll look. Cut them out and place them on the onesie to make sure they are the right size. If you're satisfied, print it out on the iron-on paper.
7. Cut out the images, leaving about 1/8 of an inch around the edges.
8. Following the directions that come with your iron on transfers, iron them on. The directions will probably tell you to have the iron as hot as possible for the fiber in the onesie (probably cotton), not to have the steam function set, and to press as hard as humanly possible when ironing. I was super scared about this step, but it worked out perfectly.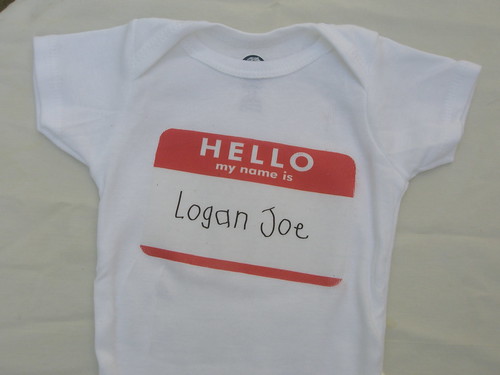
Cute, huh? And such a good deal!
4 100% cotton onesies... 5 dollars
1 sheet of iron on transfer (from pack of 6)... 1 dollar
Forcefully demanding your unborn nephew to declare his love for you from birth... priceless
Thursday, May 1, 2008
Onesie Crazy
![]()
Subscribe to:
Comment Feed (RSS)
|