Is it weird that one of the first things I started thinking about when I found out I was pregnant was all the things I would knit for my baby? It must not be too weird, because most of my friends and family members had the same reaction when we shared the news that we were expecting: first, "That is amazing! We are so happy for you!" Almost always followed by, "Has Farrah started knitting yet?"
So it was a lot of pressure to make something seriously awesome for my little boy. I have to say I think I found the perfect pattern in the Gift Wrap Romper. Because he was due at the end of June, I used a cotton blend yarn (Yarn Gang again, purchased on sale again, so total yarn cost of this cuteness was $3). The pattern is fantastic, the process is easy, and the results are...
freaking adorable if I do say so myself.
But wait. That's on the hanger. What about on an actual baby?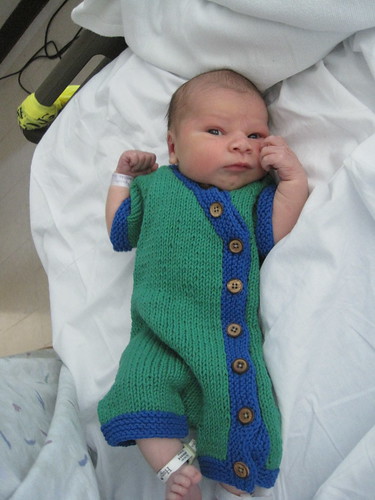
Ridiculous adorable. I am obviously biased, but I do have the cutest model in the entire universe. My little guy was 6 lbs. 14 oz. at birth and the newborn size of this romper fit him perfectly. He wore it for his official hospital pictures.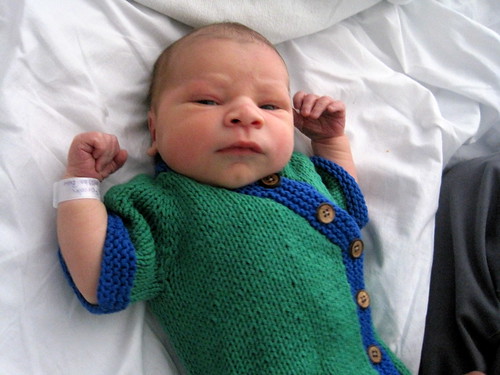
He has also gotten a lot of use out of the simple little umbilical cord hat I made him out of Mini Mochi.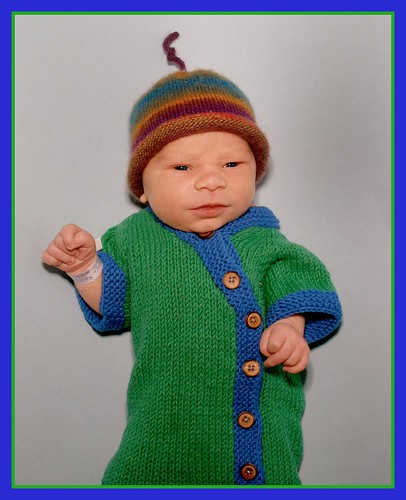
My little model's name is Cian and as expected, he has become my knitting muse and pretty much the center of our world. I can't resist throwing in a non-knitting related picture because this level of baby-liciousness has to be shared...
Sunday, July 4, 2010
Most satisfying FO ever
Monday, May 24, 2010
DIY Bright Modern Nursery
The nursery project has been in progress for about 6 months now and I have concentrated every nesting instinct I have into this teeny tiny room. We went back and forth, but finally decided to use this mini-room because it gets the best light in the house, has the best view, and using it meant we wouldn't have to get rid of our guest bedroom. It was definitely the right decision.
This is the "before" picture- taken from the doorway right before the painting process began...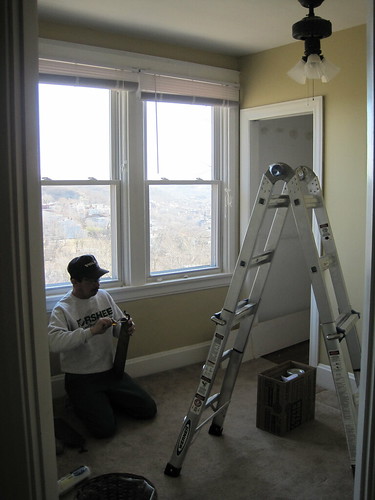
And here is the after!
The room doesn't have a theme exactly, but a few motifs. Circles and owls seem to come up a lot...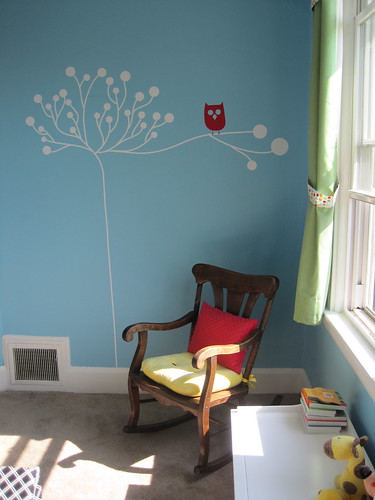
Now for the details. The stuff that was bought:
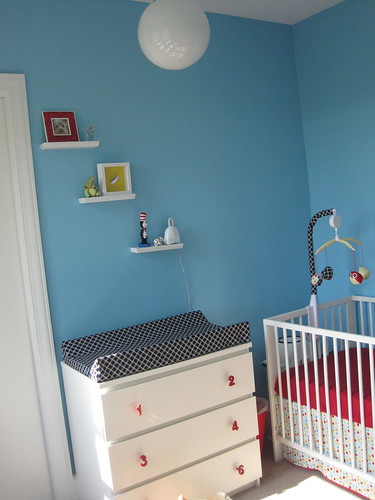
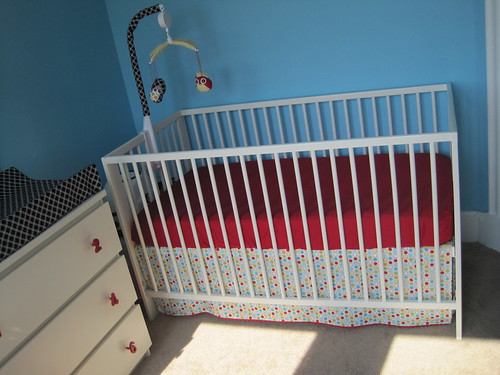
1. The crib is the Gulliver from IKEA, which was chosen because it was the smallest crib we could find. Pretty much everything else we considered wouldn't fit into the room.
2. The changing table is also from IKEA- the old standby dresser everyone has in their house, the Malm.
3. The rocking chair is an antique that my parents found on Craigslist and gave us for Christmas.
4. The chest of drawers thing under the window was an amazing find from HomeGoods. It was on clearance for only $100 (marked down from $400!). I couldn't believe how perfectly it fit in the space.
5. The pendant lamp is also from IKEA- the Fado. I love it because it kinda reflects the circle thing we have going.
6. The vinyl wall decal is from Etsy, a shop called Surface Inspired. More circles there and of course the owl which I am obsessed with.
7. Eclipse curtains from Target. I had every intention of making curtains, but when I found these at Target and they were the kind that wouldn't let light through PLUS they had textured circles all over and matched perfectly, I knew it was meant to be.
Stuff we made:
1. The crib skirt. After hours and hours of scouring the web for the perfect material, I ended up finding it at Hobby Lobby. We started out with very plain flat panels but wanted to add a little something extra and ended up finding the rick rack in the craft supplies that I inherited from my grandma. I love that a piece of her is in this room. I looked all over the internet for a pattern for an IKEA crib skirt and couldn't find one, so we made one up. If people are interested, I will try to put together a tutorial.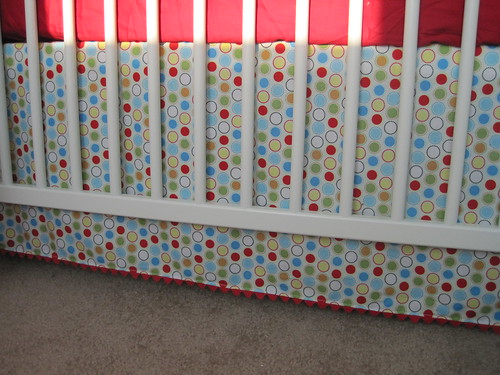
2. A valence and curtain pulls. I wanted something really flat for the valence, but I didn't feel like making a wooden box and hanging it up. The valence is two layers of fabric with a layer of interfacing in between to make it sturdy. There is also a cord running along the bottom inside to keep it straight and flat. The buttons on the curtain pulls are from the great stash given to me by Mema, so a great-grandma is also represented in the room.
3. Chair cushion and pillow. Material, stuffing, and pillow for these was purchased at Joann for 50% off. To make the chair cushion, we traced the chair bottom onto tracing paper to make a pattern. Cut out two fabric pieces, pinned 4 pieces of ribbon to serve as ties between the two pieces of fabric, sewed it all together, stuffed it with polyester stuffing, and sewed on 4 buttons. For the pillow, just cut out two fabric rectangles 1 inch larger than the pillow form and sewed them together.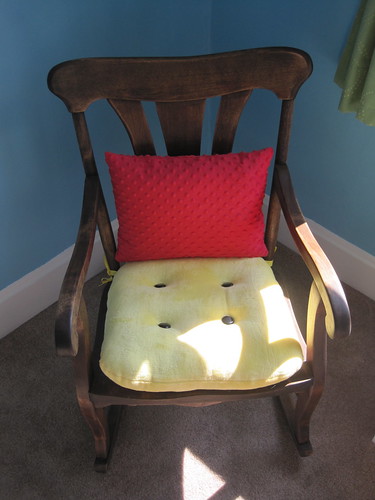
4. Changing table pad. To be honest, this is still a work in progress. I made a pattern that would fit the curved sides of the contoured changing pad and sewed them to a piece of fabric that fit all the way around the pad, but right now it is pinned underneath until I can get help figuring out the best way to attach elastic.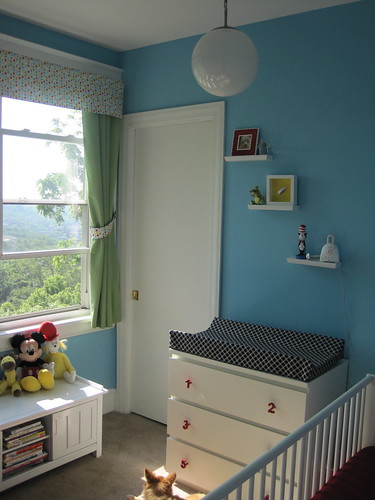
5. I found the set of red number drawer pulls at Pottery Barn Kids Outlet for only $5! It was more difficult than expected, but Bryan drilled holes into the Malm dresser to put in the drawer pulls and I think it makes a HUGE difference.
6. The owl mobile, of course, which is described in my last post.
So that's where we're at right now. We have 5 weeks before he's scheduled to arrive and I have a few more things I'd like to get done before then. I want to make a quilt with all the different materials we used in the nursery, but I haven't made a quilt before so it could take some time. I also would like to figure out something to hang up on the wall over the crib, but I am paranoid about hanging things because I'm afraid they will fall on him. I also have 2 or 3 knitting projects I'd like to finish before he gets here as well. OK, all that seems a little ambitious now that I write it out.
If anyone has any ideas for safe things to hang over the crib, I'd love to hear them!
Tuesday, May 4, 2010
Owl Mobile
We wanted to create a modernish nursery that had no real theme but just had lots of bright colors and simple shapes. It worked pretty well, I think, but I did get a little obsessed with owls as I went along. Not enough to make it a theme I don't think, but you'll see owls sprinkled around a little.
I wanted to make a handmade mobile for the baby, but I sort of liked the idea that store-bought mobiles could move and play music. I got inspiration when I saw a mobile at TJ Maxx that was missing some pieces (it was also fairly ugly). In a move that is totally unlike me, I talked to the manager and asked if I could get it for a discount because it was missing the little arm covers that were shown on the box. The manager said yes and I got this mobile that winds up to move and play music for only $10.
I found these absolutely ADORABLE owl stuffies on Flickr and decided to make the mobile with little owls that are sewn from the fabrics that I used around the rest of the nursery. I made one test one and loved it, so I gathered everything I would need to make 3 more.
Using the great directions in tutorials by Jenny the Artist and Moonstitches, I sewed these little guys up in just a few minutes. It was a little more fiddly to do the rest of the sewing by hand, but once I got that first one figured out it took no time at all.
I love each of these little guys so much I can't help but show you each one separately. It would be unfair to focus on just one.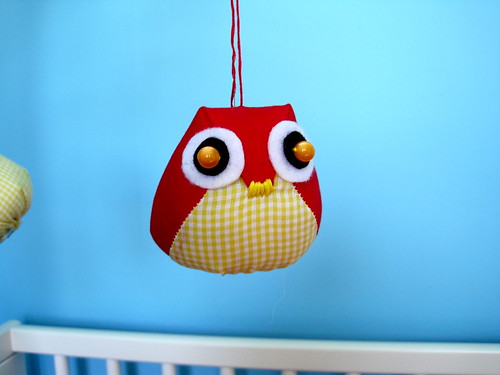
One major hint I would offer to anyone making owl stuffies (or any other stuffies for that matter) is to splurge on felt that has sticky glue on the back. It is SO much easier to work with the tiny little felt circles if they just stick where they are supposed to end up while you sew.
I seriously don't have a favorite. I love them all.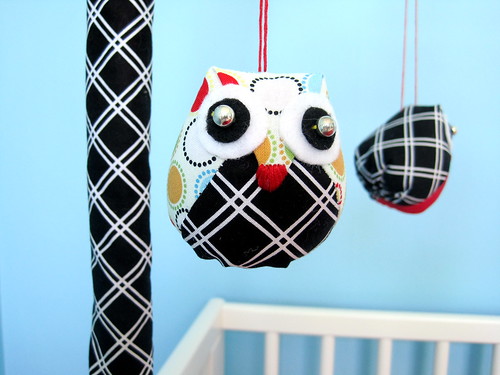
As always, my embroidery skills leave lots to be desired, but I tried to use a satin stitch for the little beaks.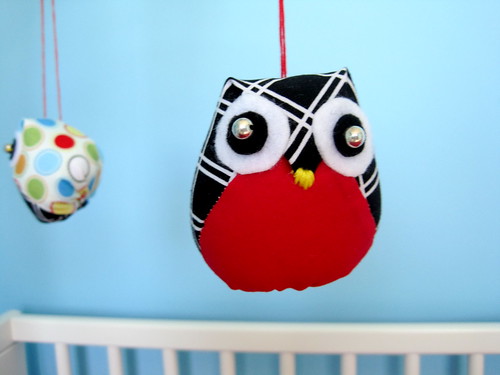
I threaded the red embroidery thread through the backs of the owls at an angle so that they were all facing down toward the baby. That way he'd be able to see the contrast, which is kind of the whole point of mobiles, from what I understand. It bugs me when mobiles are angled so that adults can see how cute they are but the babies can only see the boring bottoms.
For the base and the arms, I just measured the girth of each piece, added half an inch along each side for seam allowance, and cut rectangles. Then I hemmed the short ends and sewed the long ends together to form tubes. Slip the tubes over the base and arms and you have custom-fit covers. I did NOT want any ruffly or ruched-looking lines, so I tried hard to make the measurements as exact as possible so the tubes would fit on exactly and look straight and clean. 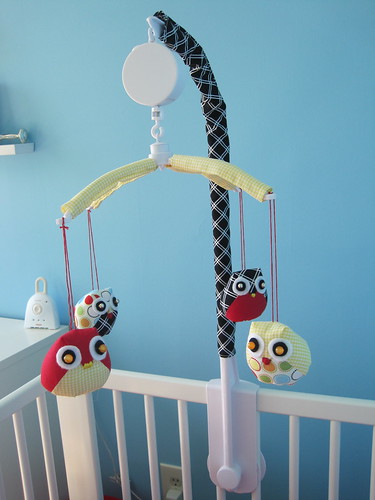
I'm thrilled with the results- this makes me want to squee every time I look in the tiny little room where our boy is going to live. I'll show you more sewing soon- I'm trying to figure out the best way to take pictures in such a teeny tiny space.
Thursday, April 22, 2010
I've been busy, but haven't had much blog-able crafting going on lately. Not secret exactly, but I just wasn't ready to put it out there to the world at large. But I think it's time...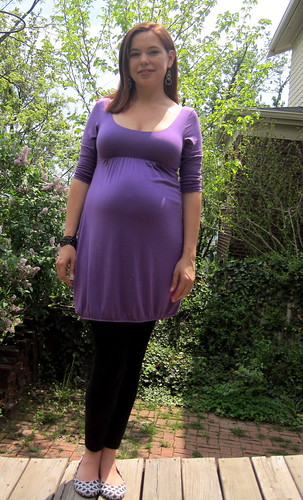
Cause it's not like I can actually hide it! We're having a baby come late June and even though I've had 30 weeks to get used to the idea, I still feel kind of shocked by the whole thing.
People who check in here often know I do a lot of baby knitting for my friends and family, but knitting for my own little guy (yep, it's a boy) has actually proven to be a little harder. I don't know why, but for some reason I can't decide on the *perfect* patterns or the *perfect* yarns. I did make him a little pair of pants, though.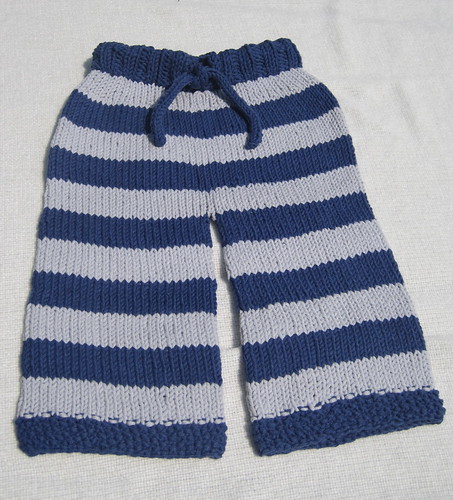
I love them. I used the Kanoko pattern as a general guide, but I didn't do any of the texture and I obviously added stripes. I also added a good inch to the length because all the pictures on Ravely made these look a little short on the babies. The yarn is a cotton/acrylic blend called Yarn Gang and was on sale at Michael's for $1 per skein, so these little pants were only $3.
As I was putting together this post I noticed that my most favorite, most anticipated baby pattern ever was just released and I will be knitting it up ASAP. I mean seriously, being able to see my baby wear this makes labor seem almost worth it. Well that and the whole miracle of creating new life stuff, I guess.
I've been doing more sewing lately to fix up the nursery. As soon as I get some time, I am going to post some details of what we've done. My mom and I sewed a crib skirt for the Gulliver crib from IKEA, curtain stuff, and a chair pad and pillow all custom made for our tiny little nursery. I am completely happy with how it turned out and am now just working on getting all the other little decorative details together.
More to come!
Tuesday, February 9, 2010
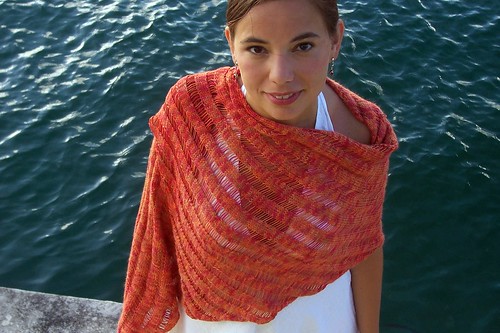
Worth the repetition
I rarely knit something twice, especially with the same yarn, but a few months back when I was working on the Baby Yours sweater, I just kept thinking about how perfect it would be for my friend Kerry's baby.
Back in December, I went to Madison, WI for the baby shower.
I made the sweater exactly the same last time, with the same Debbie Bliss Cashmerino, but I did switch up the buttons. Kerry is 100% Irish, so I thought these silver buttons were perfect for a half-Irish baby. The gender was a surprise, but I thought the color would be appropriate for either.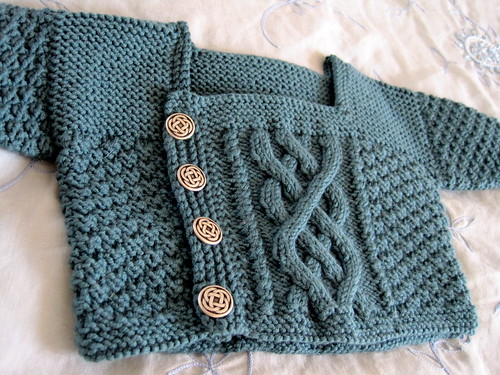
I love this little thing. Pretty simple knitting and such a huge payoff, particularly with this gorgeous cable in both the front and the back.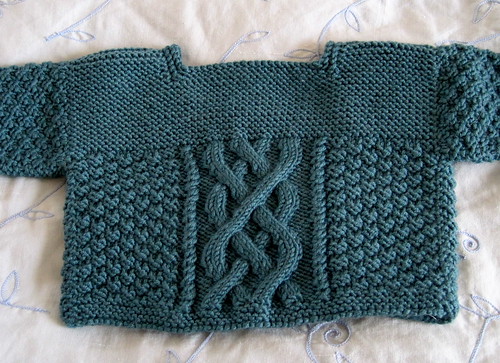
Kerry & Jason really loved it. I can't tell you how many times they have mentioned it since the shower. And here's the best part- they already sent pictures of beautiful baby Molly, just five days old, modeling the sweater!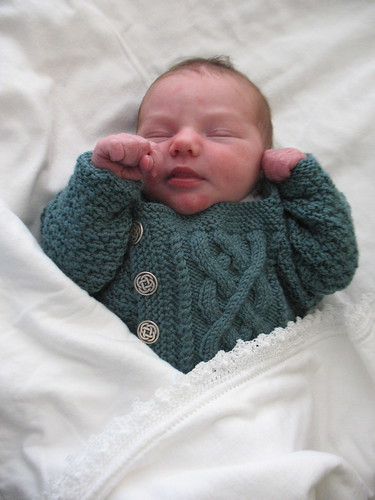
Are you freaking kidding me? This is enough to make a knitter cry. Okay, it did make me cry. Because nothing is better than a beautiful healthy baby girl born to two of your closest friends EXCEPT a picture of that baby wearing a sweater that you knit just for her.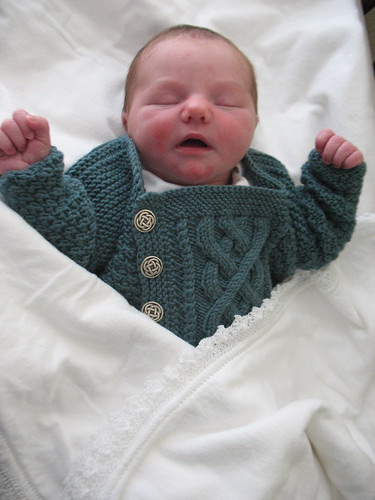
Welcome to the world, baby Molly!
Thursday, January 7, 2010
Back on the bandwagon
I can't imagine how many pairs of these slippers were knitted this holiday season. I contributed with two pairs and I have another in the works (for a particularly impatient little lady who has a birthday in about a week).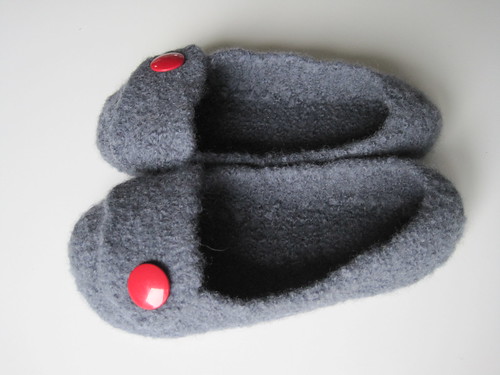
The infamous French Press Felted Slippers are a really good gift for a few reasons: all you need to know is a person's size, everyone can use a pair of slippers, and they really don't take too long at all. I didn't manage to get down to the 90 minutes promised by the Yarn Harlot- for me they were more like 3-4 hours once you consider the knitting and the considerable seaming on both slippers. That is not including the felting and sewing the buttons and flaps.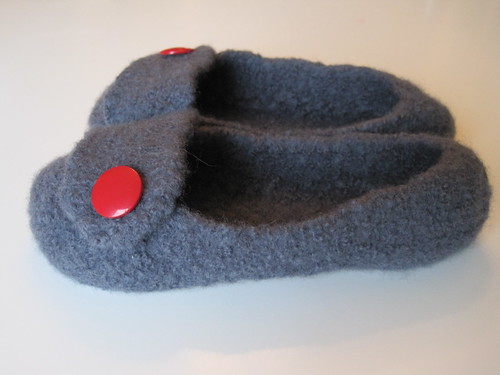
The buttons are from this huge stash of vintage buttons that my grandmother-in-law has been collecting for about 50 years. She gave me this amazing stash over Thanksgiving and I still can't believe how lucky I am to have inherited it.
Not so awesome modeled shot:
I also made a pink pair with really nice brown buttons, but I forgot to get pictures before I gave them away. So all I have is the obligatory Christmas present shot:
To be honest, they aren't my favorite thing in the world to knit because of how fiddly the seaming can be, but I do love the end product. And I think both the recipients so far have been happy. The third recipient next week will almost definitely be happy, considering the degree to which she insisted that she get a pair. I'll show you some modeled shots of those soon.
Monday, December 21, 2009
Flannel is awesome.
Getting ready for Christmas this year, I realized that my sister and I got our sewing machines from our parents last Christmas and we've had some good times over the last year. I wish I could say my sewing has advanced as much as my knitting did in Year 1 (when it was a full on, all-encompassing obsession), but I have made a few things I've been pretty happy with.
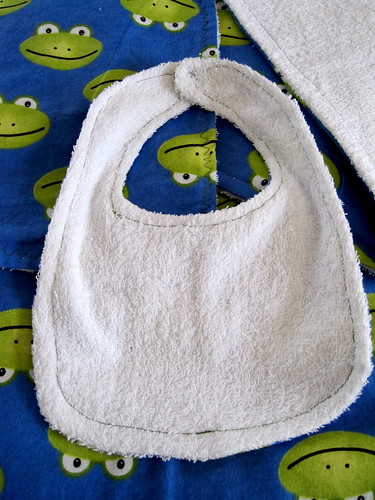
The newest is this little gift set I made for a February baby. I got some really great deals on flannel from Joann, so I looked up ideas for things to do with it. Chickpea Sewing Studio has this great tutorial for a blanket, changing pad, and washcloths and this tutorial for bibs, which were both awesome. I combined the directions from both and just kind of ran with it.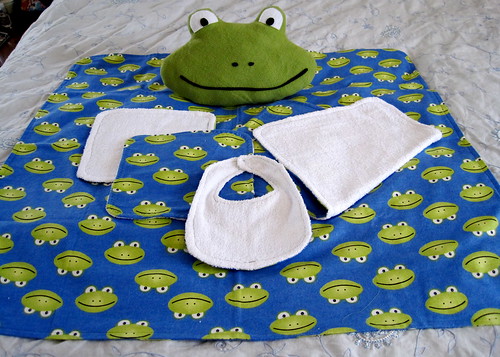
The whole little set contains a huge receiving blanket (flannel on both sides), two washcloths, a changing pad, and a bib (all flannel/terrycloth). I bought 3 yards of fabric and one yard of terrycloth. Even with my super-slow sewing skills, I finished it in an afternoon.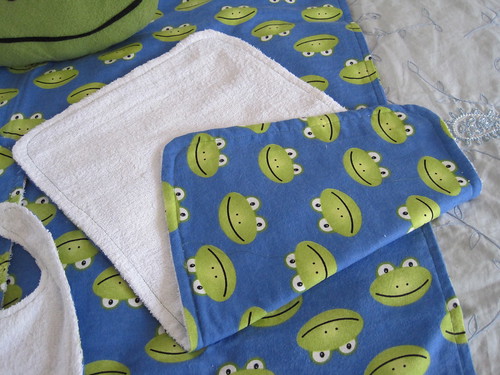
There was a fleece remnant at Joann that matched the green frogs in the flannel, so I decided to make a frog plushie to look like the frog head in the pattern. I free-handed a pattern on tracing paper to look like the frog head, then cut that out, pinned it to the fleece, and cut out two identical fleece pieces. I sewed them together right sides together leaving a small opening for stuffing, flipped it inside out, stuffed it, then ladder stitched the opening closed. Using felt from the craft store that is sticky on one side, I cut out shapes for the facial features and stuck them on the head. Ta da! Frog head plushie!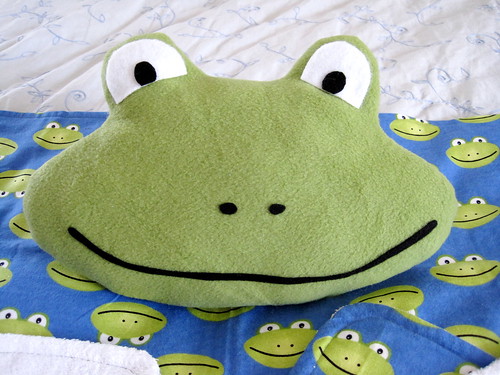
I gave it to the parents at a baby shower a few weekends back and they were pleased. They were even more pleased with the knitting I did for the little one, though- more on that later.
Hope your last minute holiday knitting is going well and is not stressing you out too much. I have one last project to finish up knitting-wise, but I think I have plenty of time to do it. Now just to wrap all the presents and clean the house and dang it I want to bake some sugar cookies too.