When we moved into the new house, I had resolved to blog about some of the renovations and other fun stuff we planned to do. Unfortunately, the renovations haven't happened as quickly as we had hoped so I haven't had much to report. But a few weeks ago, some fabulous Miami friends came to visit and I had to spiff the place up a bit so they wouldn't be appalled at my lack of style.
Our house is older and has some neat little features, like these little lamps that are above the fireplace. Unfortunately, we've been living with a big blank space between the little lamps ever since we moved in. I always see these cool looking starburst mirror wall hanging things at Crate and Barrel and other fun places and have always thought they would be perfect for that space. Unfortunately, they are usually kind of expensive (that one at Crate & Barrel is $200!). So when I saw on the CRAFT blog a DIY tutorial, I knew I had the perfect fix.
I did a little further searching on the Internet and used two tutorials for inspiration: one from Apartment Therapy and one from Instructables. I got everything I needed from Michael's, Wal-Mart, & Home Depot: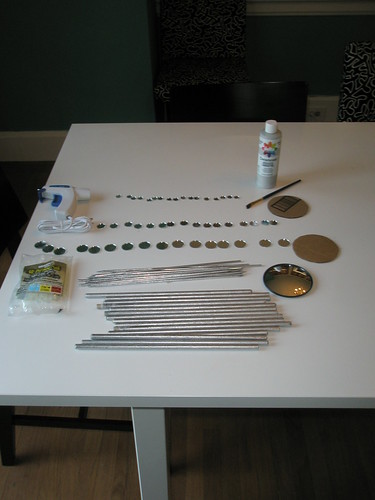
Glue gun, glue sticks, bamboo skewers, wooden dowels, silver spray paint, silver regular paint, a paintbrush, 2 packs of assorted sized circle mirrors from Michael's (50 total), an auto rearview mirror from Wal-Mart, and 2 circles cut out of carboard.
I forget how much I paid for everything individually, but all together I believe it was under $20.
All of that turned into this:
I'm really happy with the finished product, but I want to tell you about what I did wrong in case you decide to do this. First of all, I bought 4 long wooden dowels from Home Depot, spray painted them silver, and then cut them into smaller 12" sections. That was dumb, because the sawed off part was all raw and ugly and unpainted. So I had to use sandpaper to sand them down until they looked nice and then I had to hand paint silver onto the ends.
Next, I think I bought a slightly too small auto rearview mirror. Originally, the plastic ring around the mirror was black plastic. After I had already assembled the whole mirror I realized that the black plastic didn't look right. But at this point, I already had the starburst hanging on the wall, so I had to get up on a chair and paint the black border by hand with silver paint. I like the look a lot more, but in the future I would paint the center mirror FIRST.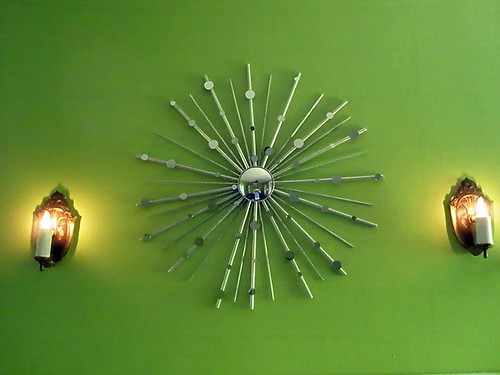
But even with the mishaps, this project was not too time intensive and I really like the results. Now that big blank spot between the retro lamps if filled, and I feel really thrifty and creative every time I look there. Definitely a win!
Monday, March 30, 2009
Starburst Mirror Sculpture
Sunday, March 22, 2009
Goth Socks
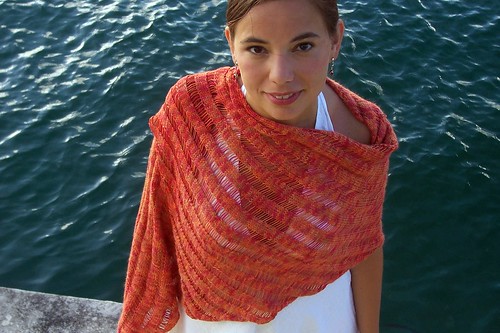
Finally I have some knitting to show you! As soon as I saw Cookie A.'s Marlene Socks in Knit.1, I knew I would be making them for myself. I got some Dream in Color Smooshy in Gothic Rose on sale from Sonny and Shear and started these socks right after the holidays. They have taken forever because I've been making mistakes and have frogged at least part of them about 8 times. But it is worth it because these are definitely my favorite socks ever.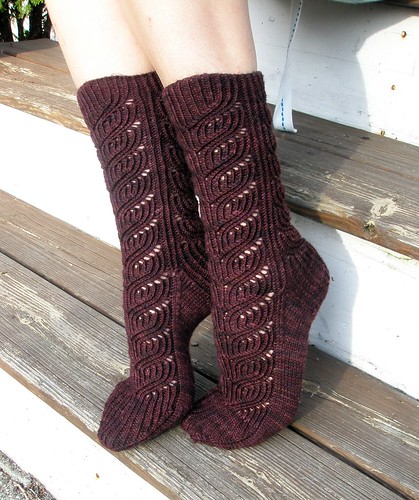
Look at this pattern! It is fantastic. All those twisted stitches make these gorgeous lines and the heels and toes flow so perfectly from the foot.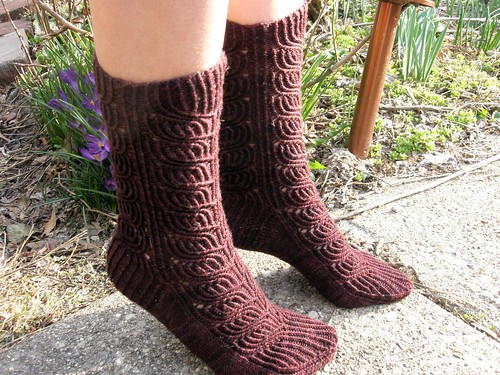
All the ribbing makes them fit really well, too. I love them!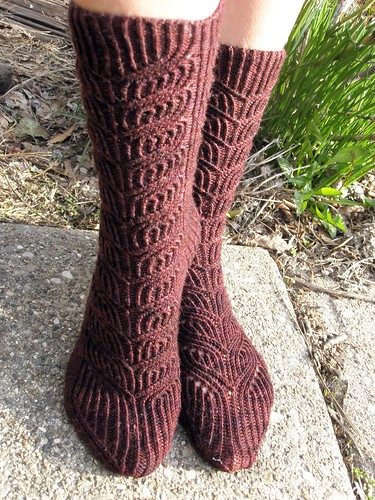
So I need to get started ASAP on a gift for my oldest friend's baby, due in early April. The little one will be living in Philly, so I think I'm going to do a little cotton sweater for spring.
Sunday, March 8, 2009
Finally- the mystery present!
Several astute readers have asked me about the picture on my sidebar of Jason's Christmas Present. In lieu of an FO picture, I just had a picture of my brother-in-law. I had to do that because Jason is super sneaky and joined Ravelry over the holidays so he could try to find out what I was knitting him for Christmas.
Jason is super supportive of my knitting habit- he hand picks yarn for my birthdays and finds knitting books that he thinks I will enjoy. He once told me, when watching me knit a pair of socks, "so basically that heel is a series of short rows, right?" Seriously! He's just the type of person to look up how to knit socks because I am knitting them, even though he has no previous interest in knitting.
So that kind of interest warrants a nice pair of handknit socks, right? I searched for a pattern that was not too crazy, but had just a little something to keep it interesting. I found Mr. Pitts socks, which fit the bill nicely. I used some Patons Kroy Sock Yarn that I found on sale the day after Thanksgiving. I think Kroy sock yarn is one of the most underrated sock yarns out there- it's not indie, but it feel great and you can't beat the value.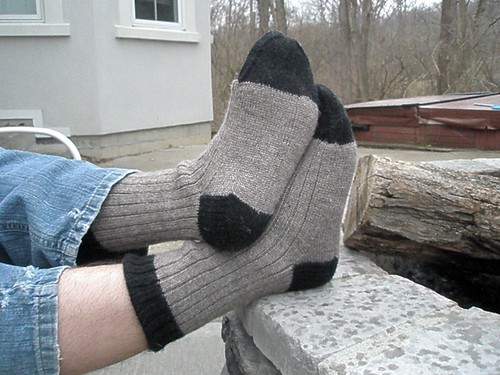
I looked up Jason's foot size online and made the socks as long as recommended according to some random sock length chart, but it turns out I was totally wrong. The socks were way too long. So after Christmas I took the socks back, frogged the toe and about 15 rows on the foot, and reknit the toe. Now they fit nicely. I think Jason really likes them, and he is a seriously deserving recipient of quality handknits.
I took these pictures tonight after spending the day sewing with my sister. Today we decided to mix sewing and embroidery and make these wacky little monsters. They are made of fleece, with felt for the eyes and mouth. We embroidered the faces, using french knots for the eyes and satin stitch for the teeth.
Aren't these guys fun? I'm going to send my monster (the one on the right) to my oldest friend Michel, who is set to have a baby in early April. Stay tuned- Michel's new baby definitely will have a knitted present, too!
Sunday, March 1, 2009
Pillows and Totes
Despite Nico's reckless disregard for my crafty efforts, I decided to try again. I made her a fleece pillow, mostly so she would have an alternative to my couch pillow. I even used the project as an opportunity to get a little embroidery practice. It worked well, but of course she started tearing it about 2.2 seconds after she discovered it was there. It's okay, though- she loves it.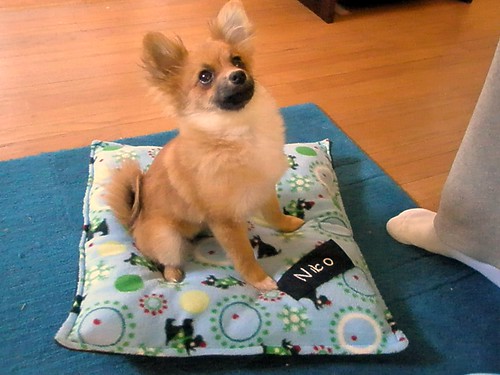
My sister and I spent Saturday making tote bags from the Sew Fast Sew Easy book. It was great- we got the fabric from Joann and recycled a sheet for the lining. We estimate that we made them for about $3 each!
We used fusible interfacing for the first time, so the bags are really sturdy.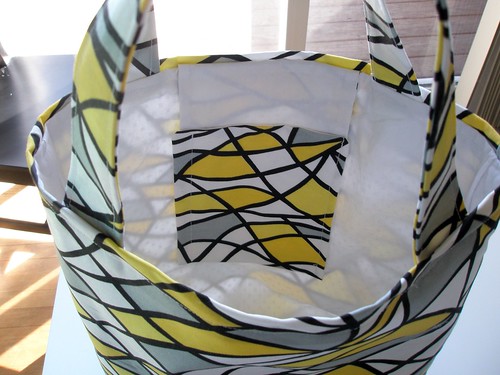
They also have this hanging pocket on the inside, which was totally worth the extra effort. I really think I'm going to use this all the time. I mean, look at how much it will hold!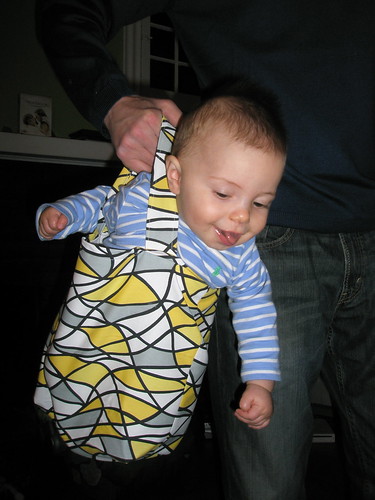
Sunday, February 22, 2009
Introducing Nico
I never thought it would happen, but we got a dog. A tiny 5 month old pomeranian/sheltie mix we named Nico. Because she's only 3 lbs. and it is freezing outside here now, I made her a sweater. Well, also because the way I celebrate things is by knitting something.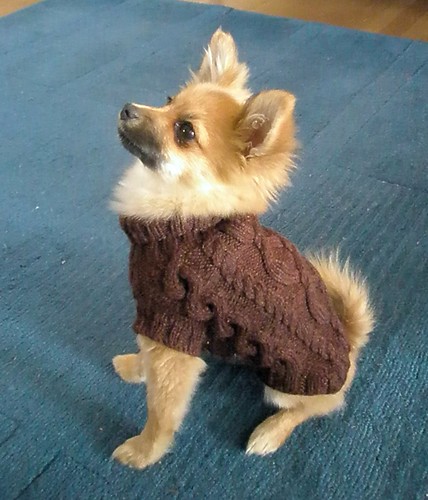
Pattern: Dogcoat from Garnstudio
Needles: Size 7
Yarn: Knitpicks Swish Worsted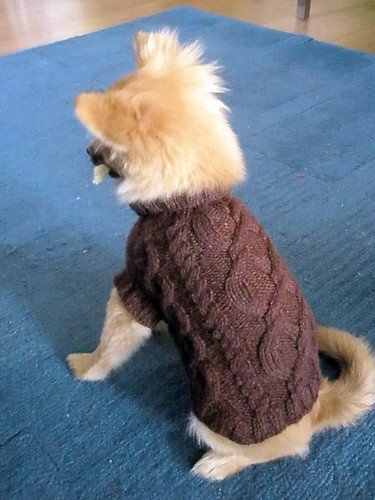
The pattern is great- it's worked mostly in the round and has these delicious cables all over it. It took about 5 days, but the process was fun. More time intensive than most dog sweaters, but the cabley goodness is worth it.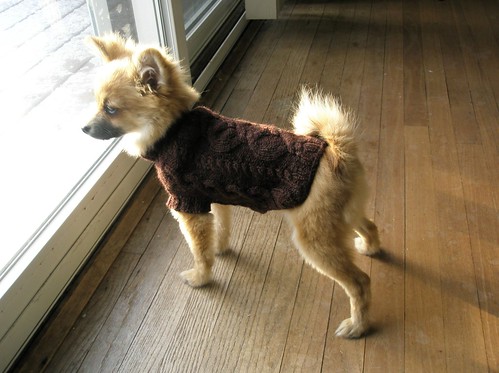
The only negative about the sweater is that it's difficult to get on the dog. It is a turtleneck, for one, and even after you get her head in, you have to wrestle her legs into the sleeves. She doesn't seem to mind the sweater once it's on, but getting it on is not her favorite activity.
Nico herself is something else. She is sweet and lovey, but playful and energetic too.
Okay, you're not going to believe this, but as I type, she just trotted into the room with the sweater in her mouth. She was wearing it five minutes ago when I came upstairs to type this, but that little monkey somehow managed to chew it off. It's pretty much destroyed. These pictures officially show the first and last time Nico wears a sweater.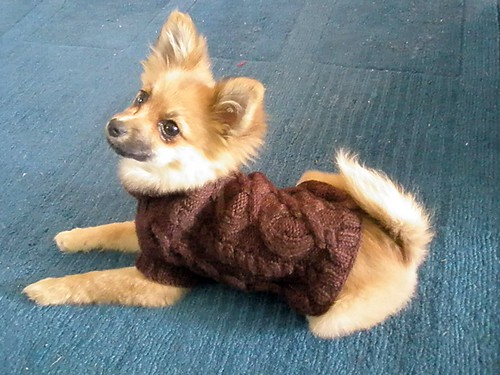
Friday, February 13, 2009
Bamboo Bear
A friend from Miami recently had a beautiful baby girl and I knew I wanted to send a care package down, but it's always difficult to decide what to make for warm weather babies. They just don't need sweaters, hats, or blankets the way that cold weather babies do. Every baby needs a teddy bear, though, right?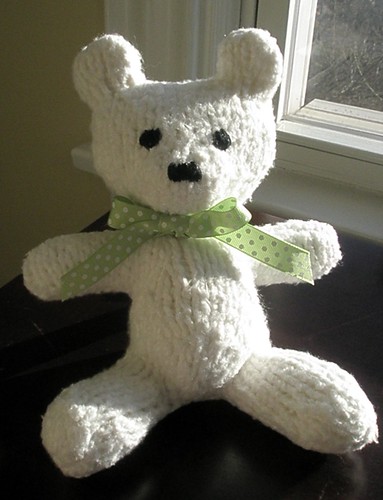
Pattern: Harry Bear pattern from Berroco (Free!)
Yarn: Bamboospun from Hobby Lobby (held doubled). (On sale for $2.50 per skein)
Needles: Size 10
Ribbon: 4 yd spool from Michael's ($1)
Total cost: $6
I know people hate talking about money and think it's super tacky to add up the total cost of things, but I am one of those people who, when complimented on a shirt, says "Thank you! I got in on sale at TJ Maxx for 7 bucks!" So when I can make a baby gift with this level of adorable for $6, I feel the need to share.
I recently went to a Hobby Lobby for the first time and was very impressed with their yarn selection- lots of natural fiber stuff and sock yarn. This Bamboo Spun is 77% Bamboo, 23% Nylon and only $2.50 for 148 yds. I could make another bear with my leftover yarn, which makes the total cost of the project even lower!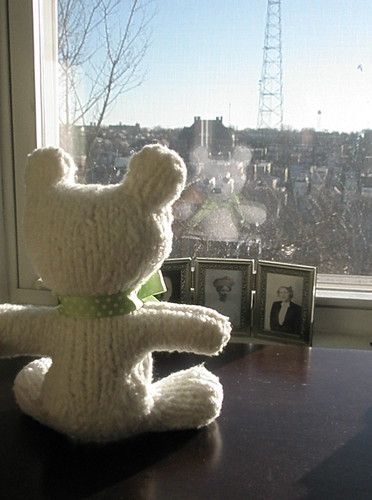
Bamboo Bear ponders the economic crisis while staring out onto the hills of Cincinnati...
This pattern is super cute, especially with yarns that are a little fuzzy or plushy. As cute as it is though, I would only knit it again if I rewrote the directions for working in the round. Seaming this little thing took as long as knitting it- seriously. As always, my seaming leaves a lot to be desired, but luckily this yarn hides lots of mistakes.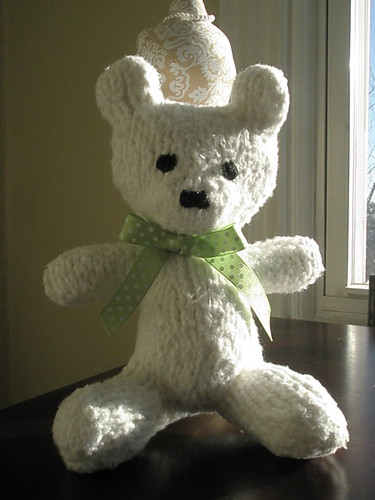
I actually started making a sweater for Bamboo Bear, but it just wasn't turning out right and it was covering his little belly, which is one of his best features. Then I started knitting him a little scarf, but I ran out of scrap sock yarn before it was long enough. I wasn't sure I liked it anyway. I decided to just go for the simple ribbon because Bamboo Bear is going to live in Miami anyway. Most people down there wear the equivalent of this ribbon as on-the-town attire.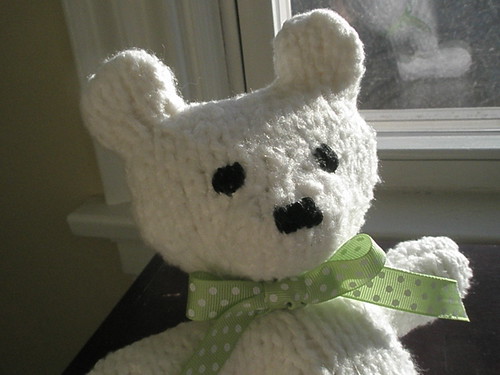
I'm sure everyone is sick to death of me complaining about how I don't know how to embroider, so I won't go into it again. I did get the Stitch It Kit for Christmas, but I haven't taken the time to really learn yet. Too much apron making and knitting and, um, having a job and stuff.
Wednesday, February 4, 2009
More aprons
My sister and I sewed on our own this weekend and made more aprons. I found this fun bee fabric and a coordinating yellow fat quarter for the pocket and ties.
I'm still working on sewing a straight line- I think I'm making it harder than it should be. It's funny- people always tell me I must be patient to knit as much as I do and I never really understood what they meant. I am extraordinarily impatient in life- knitting actually helps with that a lot. I definitely get impatient with sewing- I can't seem to get things right, so I just want to get it done.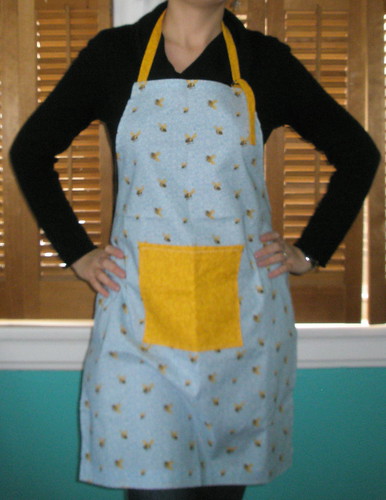
I'm going to keep practicing- I just found the Sew Mama Sew blog, which is doing a month-long series on projects to make using fat quarters (which only cost about $1.50, so perfect for practice).
Next up, more knitting. I have a baby present in the works and more of the pretty pretty Marlene socks.